A fellow quilter has inquired about how I come up with my quilt designs. I’m happy to share how one of my recent quilts came about. I’m not done piecing this one yet and I’ll share my progress in later posts.
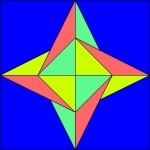 It all started with a Quilting Board poster asking about a paper pieced star and if anyone knew what it was called. I was able to find the star in Electric Quilt 7 among the Blockbase blocks, where it’s called New Star.
When I saw New Star, I thought it would be a fun block to play with, and the first thing I did was change the color palette to yellows and white.
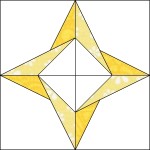 Next, I changed the position of the dark part of each star to the shorter spike rather than the taller one, feeling it would make the short spike recede into the background better and create the 3D look I was hoping for. I changed the center triangles to the background color; I wanted to emphasize the star rather than the block center.
The true test of any block design (before the sewing stage) is to place it in a quilt design and see what happens. Does it play well with other identical blocks? Does it need an alternating block, either pieced or solid, to either calm the main block down or bring attention to the main block? Here’s the block set in a horizontal quilt:
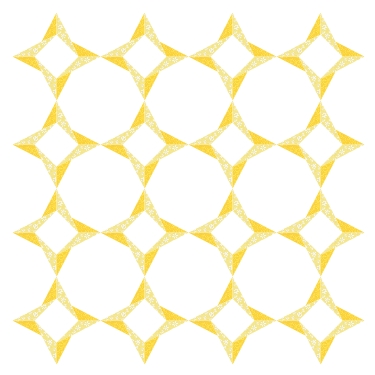
As you can see, this is a pretty boring design. There just isn’t much oomph to it. The secondary circles did appear and I always like to play with circle designs, especially those that don’t actually require piecing curves. (I have another quilt that is nearly finished which also features that effect. I’ll be posting about it as soon as I get the binding on and it will be offered as a free pattern here.)
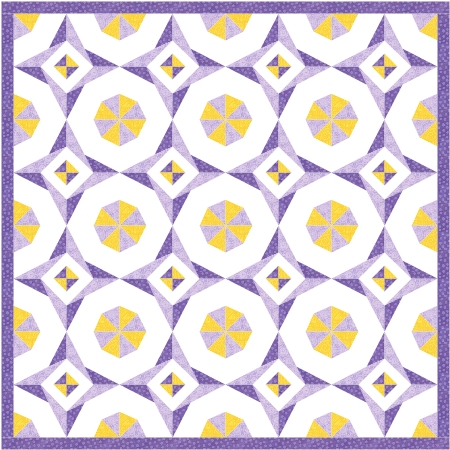
 So what can be done to fill up some of that white space? Since this is a foundation paper pieced pattern, I thought I’d try adding a few lines to each block to create additional patches. At the same time, I thought more color was needed. I went to my “go-to” palette of purples and came up with this block.
The lines I added were in the center of the block, changing one triangle to a triangle and stripe, and in the corners of the block I added two triangles which will create a secondary design without actually adding another block. Here’s the resulting quilt:
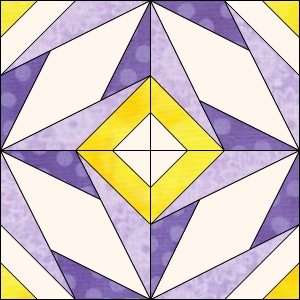
This was no longer boring, but it put the emphasis on the secondary block rather than the stars, which is not what I wanted. That gave me a new idea. Since it was the stars I liked, why not put stars in the outer corners of the block by duplicating the stars on the inside corners. In addition, I thought the center quarter square triangles also took away from the star design, so I changed those to solid colors.

The block was really shaping up! I popped it into my EQ quilt design and here’s the result:
I’m getting happier with the design, but there’s one change I want to make.
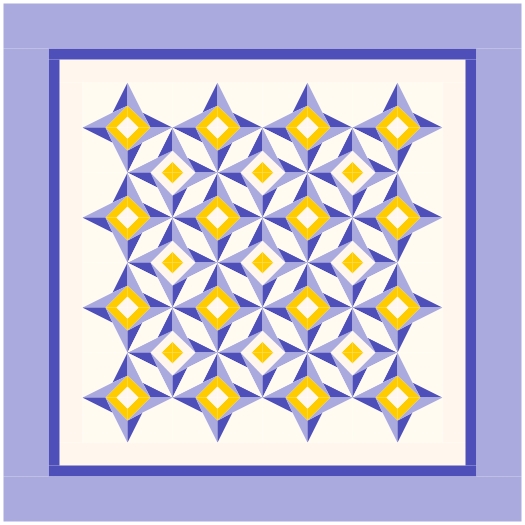
Right now all the centers of the stars have a white square surrounded by yellow. What happens if I make some of them yellow squares surrounded by white? The beauty of the block design is that all I need to do is swap the two strips of color on the corners and I can worry about placement later if I need to.
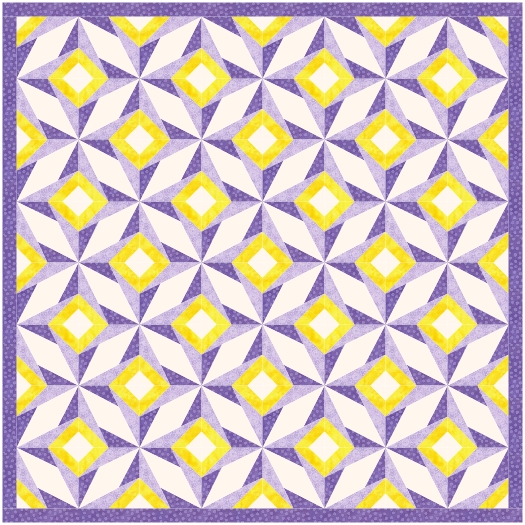
How will that work in the quilt? Check out the results:
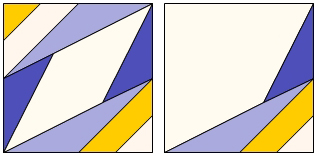
I like it, but it’s still not quite there. One problem I have with it is that it now looks too busy. I’d like the design to end with an actual star on each side of the quilt, not half or a quarter of another star. I can just color the purples and yellows along the edge with the background color, but I am after a quilt pattern here; I want to be able to print out my paper piecing foundations and know that each one will be the right combination of colors and background. I decided to work with each quarter of the block separately. That will give me the flexibility I need. Here are the quarter blocks for the center stars and the quarter blocks that go along the edge. The quarter blocks on the edges get rotated according to their position.
And this is the quilt I was going for:
Designing with EQ or on paper is great but you really don’t know how things will work, especially with an original block and design, until you actually make the quilt. As a quilter I want to make a quilt that I will not only enjoy looking at, but one that I will enjoy making. I spent the better part of a day making two blocks (eight quarter blocks) of this quilt to decide if I like it.
I found that the point where the stars come together, with its twelve seams, was not a lot of fun to piece. When you add the paper, in my case a thin vellum by Neenah, to the twelve pieces of cotton, well, that’s a lot of fabric and paper to manage, even with the best of sewing machines and some Best Press. Here are my test blocks:
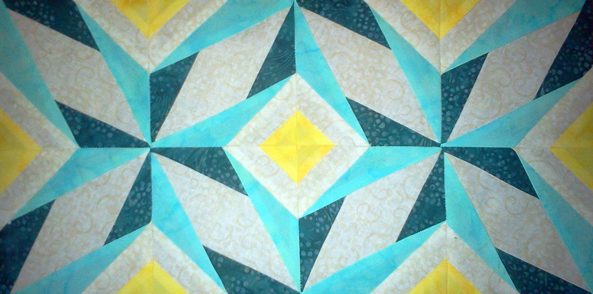
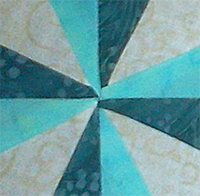 Look at those meeting points – they are not pretty! I’ve included a close up in case you need more evidence.
Why put yourself through the agony of trying to piece that if you don’t have to? In quilting, as in other areas of life, there’s no reason to do things the hard way if you can do them the easy (or easier) way and get similar or better results. When you’re designing a block or a quilt, why not design it so that assembling it is a pleasant experience?
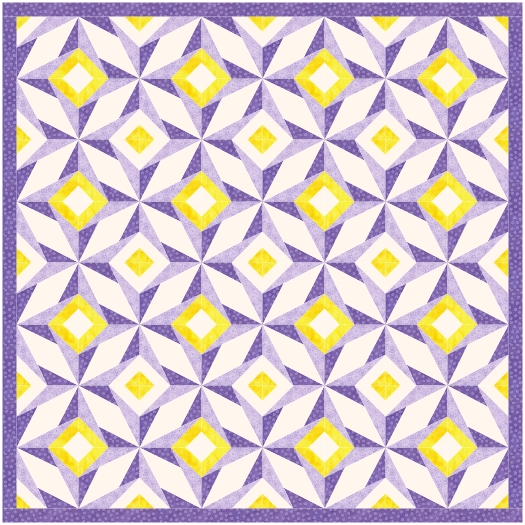
To that end, I decided that the stars would look just as good, and maybe better, if I finished their points before they made it to the end of the seam. The stars will look just as good and it was worth redoing the design to see if it might even look better.
And here is the final, final, final design for A Star is Born:
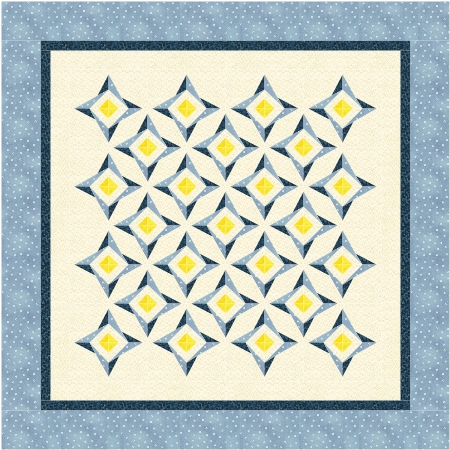
Colors are subject to change, as they already have several times. I’ll make another few test blocks before deciding to plunge forward and I’ll post them here when they’re done.
I hope this gives you some insight into the design process. Quilters often ask “how do you come up with this stuff?” and this is how. And I enjoy every minute!
This will be available as a free pattern on the Favorite Patterns page in the future. Leave a comment or subscribe and you’ll be notified when it’s available.
Love your quilt. It’s absolutely perfect. Love how you were able to lay out the thought process as you went. fascinating.
Thanks, Jan! Readers, Jan is a good friend of mine and the owner of Sylvania Quilting. She does a great job! Click on her name to get to her website.
that was very informative..not sure I have the capabilities to design that well!
LOVE IT! I adore the pattern as well as the thought process that goes into each step. Bravo on a job well done!
Thanks so much, Lora and Lynn! I’m hoping to start on this quilt soon, and once it’s together I’ll post a free pattern for it.
Enjoy!
Absolutely beautiful. I enjoyed seeing your design process for pulling it together. Inspirational.
SewCalGal
http://www.sewcalgal.blogspot.com
Thanks so much, SCG! I enjoy your blog too!
Most impressive! I love how you turned something simple into something so complex…and so beautiful! I love getting lost in your designs!
I am always fascinated by other peoples’ design processes; thanks for sharing yours.
thank you so much for sharing this – It’s a skill I don”t have and I am fascinated to read how you did this and why. Really like the end star!!
What a fun block! I love your tutorial showing your design process! Fabulous! Thanks so much for sharing!
loved the pattern would love to know when it’s available
thank you