I Love Getting Packages

The past few days have seen several fun packages arrive. I love getting things in the mail and I double love it (if that’s possible) when they are quilting related.

First to arrive was my Strip Stick which is a fairly new product designed to help with pressing long seams. It gives you a nice straight seam (no more bowing) and it helps avoid the little folds you can get if you press without fully opening the seam. This is a great product and it really works. I can’t wait to use it on my next Scrappy Trips quilt. I got the 45″ version; they also sell an 18″ Strip Stick. I’m looking forward to experimenting with other kinds of blocks that have tricky pressing needs. This product is from Babb Enterprises.

Another package arrived from Quilt Fabric Closeouts with four yards of fabric, two blenders from Faye Burgos and two civil war prints from Paula Barnes‘ Country Manor line, all from Marcus Fabrics. Other than the fabric, the best part of this package was that I bought the fabric with my FabShopHop gift certificate! I’ve been lucky enough to win in two of the recent Hops and I always look forward to seeing the shops that are out there and the specials they have for the Hop. Thank you to Quilt Fabric Closeouts for providing a gift certificate and to the FabShop Hop for sponsoring such fun events throughout the year. The February hop is taking place right now – give it a try!

The third package was from Electric Quilt and contained the EQ7 book EQ with Me: Pieced Drawing by Patti Anderson. I’m a big fan of EQ and have used it since version 5. I use it every day and have tons of designs I’ve created, some of which I’ll be sharing here with you. I’ve learned some of the finer points of the program over the last few years and this book will help me put the last pieces in place. It’s wonderfully written and illustrated and takes you step by step through the process of creating blocks, from the simplest to the most complicated. I’m really looking forward to all the fun I’ll have with it.

I hope you enjoy similar packages soon!
Easy Street – The Big Finish

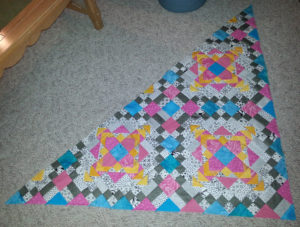
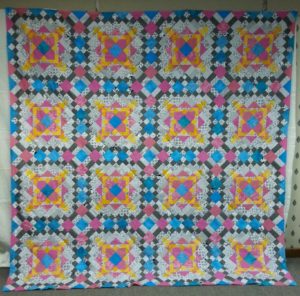
easy_street-doneI was able to complete my Easy Street top at quilt retreat last weekend. Many of the quilters had heard there was a mystery quilt happening; it was nice to be able to show them my finished version.

I had a Bonnie Hunter weekend; after I finished Easy Street I moved on to making blocks for a Scrappy Trips Around the World; the free pattern can be found on Bonnie’s website at http://quiltville.blogspot.com/2005/06/scrappy-trips-around-world.html

Easy Street – It’s Looking Like a Quilt!

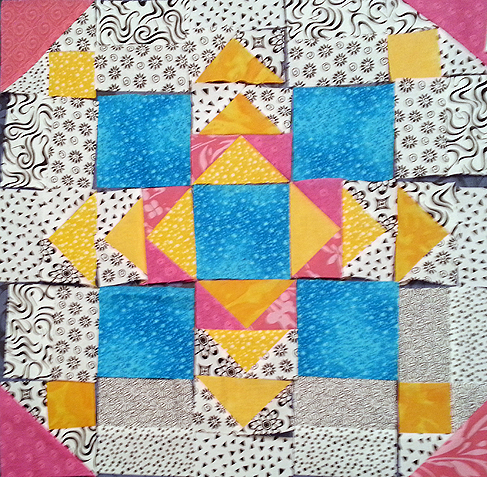
easystreet_cornerAt long last, here’s a photo of the first few rows of Easy Street. I’ll be putting the rest together at quilt retreat next weekend. Can’t wait!

I did make changes in the pattern. I wanted to have a bit more grey than was called for and I wanted it to be connected with the four patches. I moved the tall pink and yellow to the A block and put a grey/black and white brick in its place on the B block. This eliminated the secondary stars but created a different secondary pattern with the greys.

I also changed some of the turquoise squares to pink to add a little more zing and be part of the secondary pattern. Once I’ve got it together at the retreat I’ll be able to hang it and take a decent photo. And then it’s off to the quilter!

Check out Bonnie’s site for photos of over 200 quilters’ Easy Street efforts.

Easy Street – Steps 7 & 8

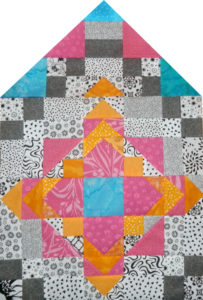
easy_street_8My Easy Street quilt is coming along; today I was able to spend several hours working on it. This photo includes the corner triangle and Block A. I’m nearly finished with all my Block As and I have finished my corner triangles. Still to go – the side triangles and all nine Block B.

Of course I couldn’t just leave the pattern alone. I had to make some changes. See if you can spot them from this small snippet of the quilt.

I’m really enjoying seeing all the different interpretations of this quilt. You’re all amazing!

Here’s Bonnie’s Linky entry!

Easy Street – Step 6

I’m caught up with all six steps for Easy Street! I sewed on Saturday with a friend and she helped me choose the final color (turquoise) to go with the pink and yellow.

It’s been a lot of fun and, even more fun, we’re getting a bonus clue tomorrow morning. I’m hoping there will be some assembly required!

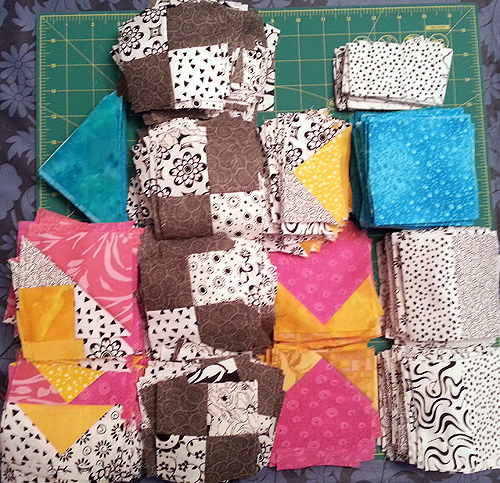
Here are the units so far…

easy_street_6

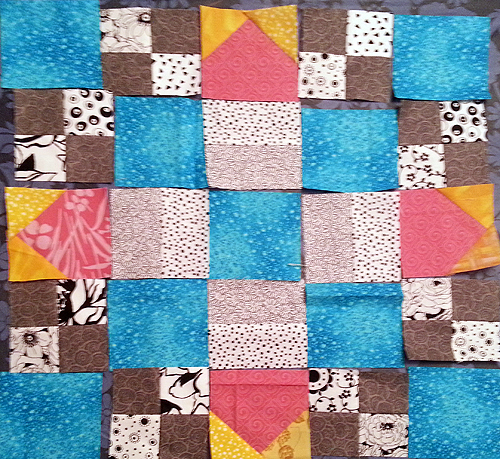
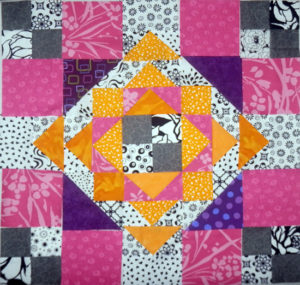
And here are a few fake blocks I put together:

easy_street_6b-fakeblock


easy_street_6a-fakeblock

Easy Street – Step 5

easy_street_5This mystery quilt is just flying by!

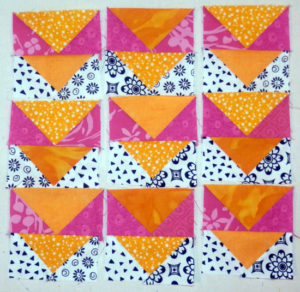
I’ve got about half of my Step 5 units done and should have the rest complete in the next day or so. This week’s task was a “sitting duck” unit or, as I’ve named it, a tall goose.

I used Bonnie’s method of drawing a line on the back of the smaller squares and found they really came out perfectly. Don’t mess with success!

I added a second line 1/2″ away from the center line and sewed along that line as well, making the cutest little half square triangle units. I’ve been saving my scraps in small sizes for some sort of scrap quilt, and these will add to my collection. The smallest squares I currently have are 1 1/2″, and these units in pairs or even as sets of three will work nicely with them. I’m thinking of nine patches with three HST units on the diagonal. We’ll see!

Be sure to check out everyone else’s work on Bonnie’s blog.


I haven’t done a fake block yet, but I’m looking forward to it. All my messing with the fake blocks has given me ideas for future quilts.

If you’re celebrating this week, enjoy the holiday!

Easy Street – Color Chart

I’ve chosen to use different colors for my Easy Street quilt – pink, yellow and purple along with the black and whites and greys. Around step 3 I managed to confuse myself and I made my shaded four patches with purple instead of pink. I’ve now corrected that and made myself a color chart to avoid confusion in the future.

I’ve got it available as a PDF and a Word document for easy editing. Feel free to share it with other Easy Streeters! Here are the links:

PDF version (not easily editable)

Word version (editable)

I’m on Step 5 now; I’ve drawn a little diagram of the color placement and I’ll add an actual unit once I’m done. It’s also not a bad way to keep track of where you are in steps; I have a “completed” column for each step.

Have fun with the mystery and enjoy your holiday!

Instructions for adding your photos to the Word document:

Go to the first of my images that you want to change. Right click on the image and choose delete. Leaving your cursor in the same spot, go to the top menu (where it says File Home Insert…) and choose Insert and then Picture. In the dialog box that appears, find the directory where you have your photo and then select the photo. It should now appear in the document. You may have to resize it, but that’s easy to do by clicking on it and dragging the borders that will appear.

These instructions are for MS Word 2010. You may have a different version and the instructions may be slightly different.

I hope this helps!

Easy Street – Step 4

easy_street_4It’s hard to believe we are on step 4 already!

Things are starting to come together and this week we were able to sew two units together.

I’ve included this week’s units as well as a “fake block”.

I like the fake block and I may even make the fake block as part of another quilt. Or it could just end up being the correct block.

Only time will tell!

I hope you all are having fun with this year’s mystery; I know I am!

easy_street_4-fakeblockIt’s been great fun participating in Bonnie’s Linky and wonderful to see everyone else’s progress. Keep up the great work!

I was a sewing machine this weekend…

easy_street_3I think that came out wrong. I wasn’t an actual sewing machine. I did get a lot of sewing done.

I’m completely caught up on Bonnie Hunter’s Easy Street mystery quilt, including Step 3 which she posted on Friday.

I’ve chosen all the colors for my quilt except for the third bright. I know it will be a bright; I just haven’t decided which one to go with. It has to be something from my stash, but believe me, that doesn’t limit me much!

I’m also working on a Stash Buster quilt from The Door Mouse. I’m really enjoying this block of the month because it is pre-cut and it has a lot of variety that I could not achieve in a scrappy quilt, at least not yet. The stash we are busting is theirs, not mine, and it includes fabrics that I probably wouldn’t have purchased. It’s been a lot of fun and I’m looking forward to seeing it come together.

I’d love to see what you’re working on; feel free to post the name of your quilting blog below, and I’ll check the “linkys” at Bonnie’s site later today.

Enjoy!


Step 2 of Easy Street – Flying Geese

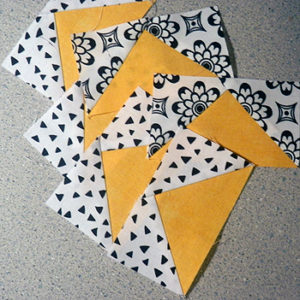
easy_street_2I’m working on completing Step 2 of Bonnie Hunter’s Easy Street Mystery Quilt. While Bonnie is using purple for her geese, I’m using yellows/golds. I’ll be using purple as one of the main colors.

I didn’t get all of my geese made yet; this is just a small sample. I’ll be working on them throughout the week. Although both of the sky pieces match on each of the geese in the photo, most of mine do not match. It’s totally random, and that’s part of the fun!

I’m looking forward to Step 3!